How to Share a Project with ERA Live
How to Share a Project
Required Access Level
Account: User
Project: Owner or Account Administrator
1 Navigate to the Project page
This can be done by (1A) navigating on the website or by (1B) clicking on the share button in ERA.
1A Website Navigation

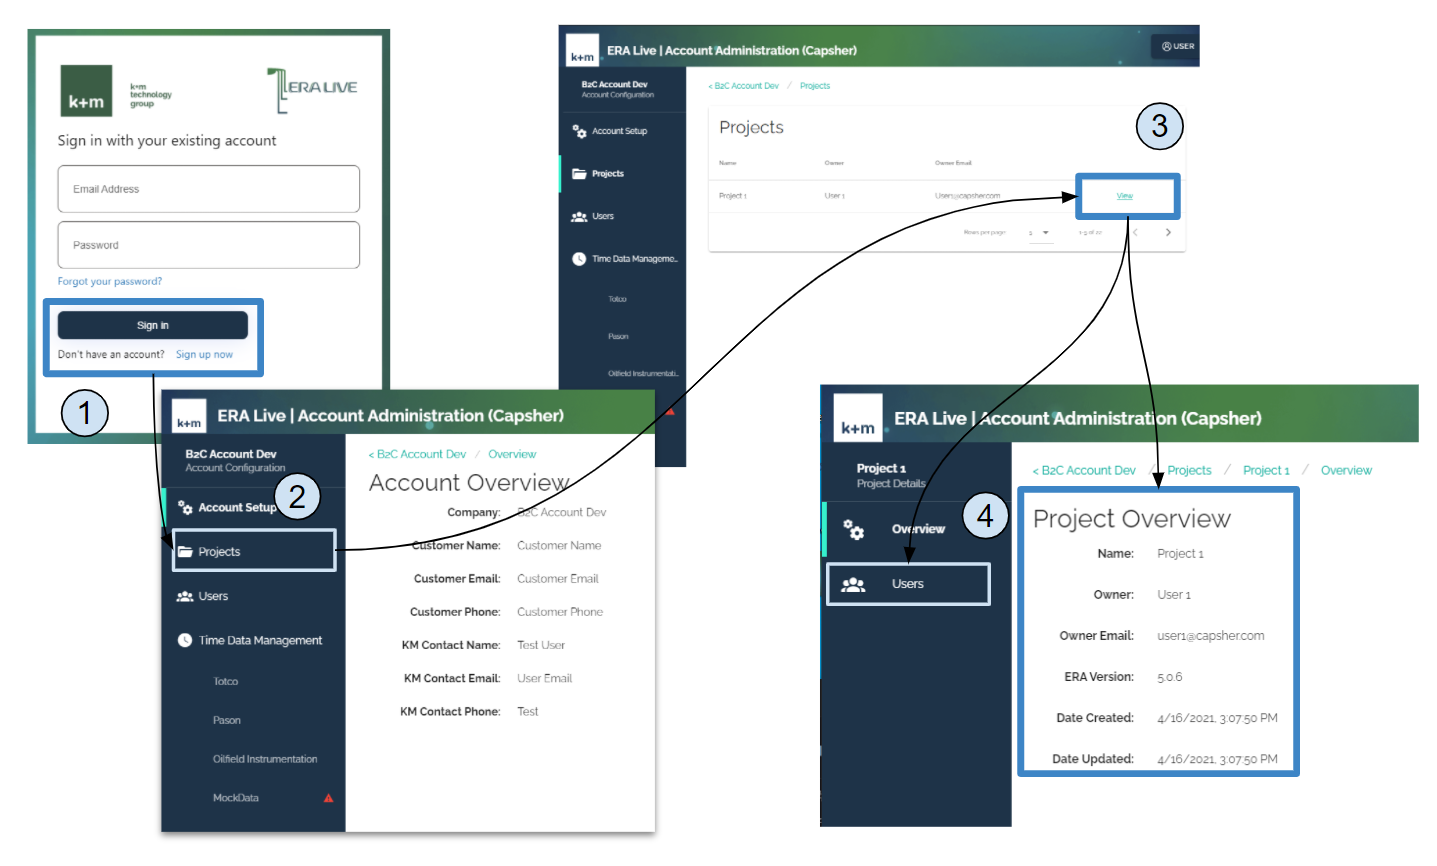
- Login to ERA Live - Account Administration (https://eralive.kmtechnology.com/)
- Use the sidebar navigation to select ‘Projects’
- Select ‘View’ for the desired project
- Review project overview or use the sidebar navigation to select ‘Users’ for user management for the selected project
1B Share from ERA

- After opening the project, click ‘Take Project Online’
- Click ‘Share Project’ within the same menu, it has replaced ‘Take Project Online’
- Your browser will automatically populate a tab with the users page for the project so that you can move forward with user management workflows
2 Edit the User Access List
You can either (2A) add a new user or you can (2B) change a user’s role.
A user can be given one of two roles on the project:
- Viewer - This is a user who is able to download and use the project without affecting the project on the cloud. A viewer can take ownership of the project through ERA.
- Owner - This is the only user whose changes to the project affect the project on the cloud.
2A Add User

- From the project overview, use the sidebar navigation to select ‘Users’
- Click ‘Add User’ to open the ‘Add Users’ modal
- Select users from the drop-down and click ‘Add User’ to add to the list of selected users
- Review list of selected users, click ‘Done’ to add selected users to project
2B Change Role

- From the project overview, use the sidebar navigation to select ‘Users’
- Click on the right context menu for the user management options for each user
- Select ‘Remove Access’ to remove that user’s association with the project, select ‘Make Owner’ to transfer ownership, the existing owner will become a viewer